Showing posts with label DIY. Show all posts

Tuesday, April 24, 2012

Oinks & Hops: A Teal & Green Ombre Beer Tasting & Whole Hog Roast


I turned 34 last Wednesday and wanted to throw a party that reflected the things I love: (1) the colors teal and green, (2) pork and bacon and (3) beer!

When I looked at other "beer tasting" parties for inspiration, everything I saw was masculine. I thought, hey girls like beer too! So that's why I decided to do a beer tasting with a feminine touch -- i.e. lots of pretty paper, flowers and teal and green. In addition, I love pork! My friend has a caja china -- which is one way to roast a pig above ground. We placed 80 pounds of pasture raised pork from Marin Sun Farms inside the wooden caja and put hot coals on top -- the radiant heat from the coals slow roasted the meat over four hours.

Putting Pork + beer together, I came up with a clever name for my party theme: Oinks and Hops! I asked guests to bring a 6-pack of beer (assigned by first name) of varieties ranging from lager, stout, wheat beer, amber ale, and more to share and taste.
Caja china for hog roast - photo by Brittany Piehl (c) 2012
 Alison of Two for Two Cakes baked my desserts and I styled the spread. My cake was a chocolate Guinness stout cake with cream cheese frosting and a chevron pattern topped with a mini bunting banner from Etsy shop, Potter and Butler. I happen to have a "Keep Calm and Carry On" poster in our living room and love the saying so much that I had Lush Prints make a custom rubber stamp with the saying, "Keep Calm and Eat Bacon," which I used to decorate craft paper favor boxes for mini chocolate donuts. Alison also made "Oinks" -- usually called Twinks -- that were made of Devil's foodcake with maple buttercream and candied bacon. And continuing the beer theme, we had mini root beer float cupcakes -- vanilla bean cake with a sarsaparilla extract. 


Vanilla bean root bear float mini cupcakes - photo by Vera Devera (c) 2012

Some of the stands were metal fruit baskets (with honeycomb die cut) that I turned upside down to place the cupcakes on top of. Porcelain pigs with mini cards denoted the flavors. For weeks, I toiled over making tissue paper fringe -- which I strung together with fishing line. I hung them from a curtain and tied glitter glass numbers, "3" and "4" to the middle. The backdrop for my desserts was comprised of the fringe curtain, honeycomb paper flowers and white tissue paper poms tied with teal fringe and gold foil centers.

Outside we strung bistro lights and decorated the tables with teal-green ombre linens. I tied green-blue striped napkins with twine and paper hearts for the lime green cutlery. For the buffet, I potted succulents in bargain bin silver pails from Target and I wrote the names of the dishes on chalkboard garden markers with a wet erase chalk pen. Green paper lanterns covered some of the bistro light bulbs and a fringe garland hung above paper mache "CHEERS". I also set out a mini bucket of paper mustaches on straws -- for guests who wanted to have a little fun drinking their root beer.
Keep Calm & Eat Bacon Custom Stamp by Lush Prints - photo by Jill Kunishima (c) 2012

At the end of the night, my friends lit sparklers and dainty candles and brought my cute chevron cake out to me. One of my favorite photos of the night is of me blowing out the candles, hands clasped as I made a wish.
Make a wish! - photo by Alison Okabayashi (c) 2012


Being surrounded by my wonderful friends and eating and drinking a delicious spread was the best ever!

Vendors:
Mustache straws

Beer tasting!

Menu window


Solar lantern

Oink!

Devil's foodcake twink with maple buttercream & candied bacon by Two for Two Cakes


Friday, April 6, 2012

Easy, DIY vertical succulent garden

Vertical succulent garden by Vera Devera (c) 2012

If you're planning a wedding with succulents, I'm sure you've seen lots of inspiration for vertical succulent gardens. I'm hosting my own birthday party in a couple of weeks and that has motivated me to get our backyard in shape.

First thing on my list: salvage a pallet and turn it into a kickass garden. And that's just what I did!


Materials:
  • 1 salvaged pallet (i.e., rescue an abandoned pallet off the street, usually outside a warehouse or store)
  • Burlap
  • Upholstery staple gun
  • 3 cubic feet of soil
  • Compost
  • Lots of plants
You can follow the tutorial at Life on the Balcony, or you can do what works best for you. I basically stapled the burlap to the back (at least 100 staples) and around the sides and bottom of the pallet. Then with the pallet laying flat on the ground, I worked from the bottom up filling the pallet with soil-compost. The first row was comprised of sedum (best to buy a flat of ground cover sedum at Home Depot for $14), the next row was heirloom Bull's Blood beets with coleus and lamb's ear, followed by a row of petunias and more coleus and ecchevaria. I topped off the vertical garden with more beets, oregano, thyme and other varieties of petunias.

This is a great backdrop not only in your backyard, but I can see it used as an escort card display, especially for a garden wedding. The cards can be "sown" into the soil with wooden seedling markers Or it can be a cool architectural feature as part of the setting the scene for your succulent-themed wedding.

Saturday, March 24, 2012

My fringe obsession

Since throwing the Old School Party last month, I've been obsessed with fringe, especially since I made this fringe garland!

Now, I'm in the throes of planning my birthday bash and I've been collecting a ton of ideas for using crepe paper (not tissue paper streamers or sheets) to decorate our backyard.

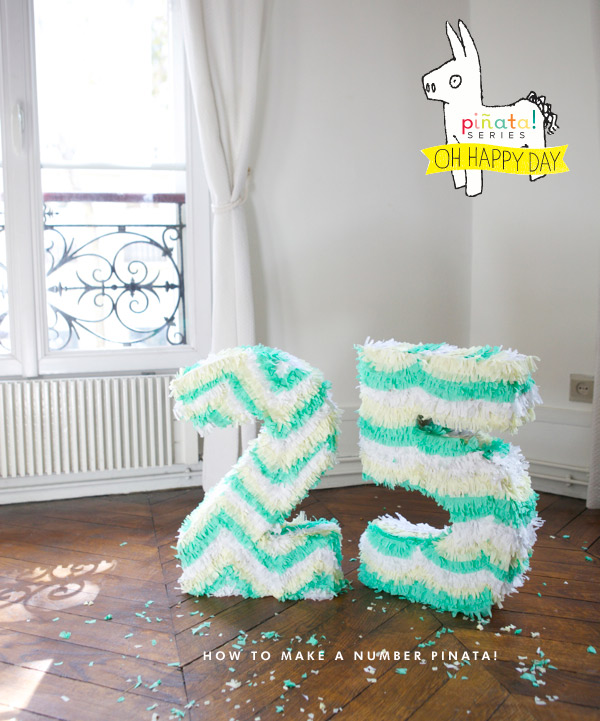
The giant fringe pinata idea (from Jorday Ferney's Oh Lovely Day) can be used for your e-session as well -- especially if you're planning to use the photos for your save-the-dates. Otherwise, it's perfect for a birthday celebration.

via Oh Happy Day: DIY Monogrammed Fringe by Michaela of Blissful Fete
If you're not up for DIY, then you can purchase these Wish Cupcake Toppers for $12 on Etsy:


See more at my Pinterest board, Pretty Paper Lust: http://pinterest.com/10kbride/pretty-paper-lust/

Sunday, February 12, 2012

Work in progress: vintage LP record cake stands

Vintage LP Cake stands (c) 2012 Vera Devera
I'm planning a surprise party with a vintage college prep theme at the end of the month and the birthday boy digs his hi-fi collection. I couldn't think of a better way than these vintage LP cake stands to display the awesome dessert bar that Two for Two Cakes is creating!

Materials include: LPs of various sizes ($0.50-$2.00 at Half Price Books), super glue and candlestick holders (I got mine for an additional 40% off at the Salvation Army) to serve as the base. I spent less than $10 for 4 cake stands.

And below is the inspiration (Oh Happy Day). I did go to TAP Plastics as their tutorial suggested and considered using their plastic cake stands but the records I bought were thicker than those made in the 1960s-70s so I didn't think I needed the extra support from a plastic round.

via Oh Happy Day

Friday, February 10, 2012

DIY Classes for the DIY Bride

I am a big fan of Workshop SF because they help you tap into your inner-craft-child!

This past Tuesday, I took Sewing 101 at Workshop SF. For a DIY-liter like me, I needed to refresh my skills on how to sew by hand and machine. Carmen, the teacher, is also a visual manager for Anthropologie on 4th and Market and teaches this class in her spare time. After 3 hours on the Janome, I now feel more comfortable with sewing by machine (it's easier than I expected) and I can't wait to start making my own pillows and baby shower gifts. In fact, I went out and bought a Brother (35 stitch) on HSN the next day for $99!

My PBR Beer Koozy - Project #1 at Workshop SF

A DIY project that requires sewing skills! via Project Wedding
More classes that are geared towards the DIY bride are being taught by one of my go-to wedding floral designers: Pilar Zuniga of Gorgeous and Green. Plus, she's just launched her online store, so if you can't get to her brick and mortar retail location on San Pablo Ave in Berkeley, you can satisfy your fix for terrarium or other locally-made prettiness.
Bouquet by Gorgeous and Green Events; (c) 2011 Stephen Hughes Photography

Sunday March 18th:  Fun with airplants  6-8pm
People love airplants.  We love airplants.  If you love airplants, come hang out with us and make fun stuff with them.  We will provide lots of cool branches, wire, secret cool stuff and tools, and we'll show you how to carefully design with them.  $50 donation at the door, $45 donation pre-paid to cover the cost of airplants and materials.  We will have some snacks and drinks as well. We will have this listed on the web store. Space is limited.
Check the online store.

Sunday April 22nd: After hours flower arranging  6-8pm
Featuring locally, sustainably and/or organically grown flowers, greens and branches.  We'll show you some techniques to creating arrangements without floral foam, and you can walk away with your creation! Some snacks and drink will be provided.  $75 donation at the door or $65 pre-paid, 12 person maximum, so book early. 
Check the online store.

Sunday May 20th: Bouquet Making: for the DIY bride, groom, family or friends!  5-7pm.
We do a lot of weddings.  We would love to decorate your wedding. But for some, budget is a challenge, so come to our DIY event to learn some basics on making a hand-tied bouquet (we never use floral foam, terrible for us and the environment, yuck ), and not only will you walk away with skills and a lovely bouquet, but you will also get a special coupon to use with us if you need to order bulk flowers for your wedding!  $85 donation at the door or $75 prepaid. Space is limited.  Check the online store.

Thursday, November 17, 2011

Round up of my fave DIY ceremony "arches"

I adore wedding altars that are handcrafted and whimsical and here are some I recently pinned to my Pinterest board. Yes, some of these can be made on a budget, but don't forget to be creative when it comes to the materials. For example the ribbons can be more affordable if made from muslin, versus silk. Fabric bunting is cute, but depending on the pattern, the cost may add up, especially if you'd got a lot of ground to cover. Sign up JoAnn Fabric's enewsletter or shop at your local fabric discouners. And tissue paper flowers can be time-consuming to make.

As with any DIY project, plan ahead and set aside enough time to complete it -- at least 2-3 weeks before the big day.


Monday, October 31, 2011

Happy Halloween: Cute & Easy DIY Projects

Last night, we hosted a pre-Halloween/housewarming party that sported a macabre vibe. It was SUPER FUN!

Guests enjoyed the DIY terror-rarium bar where they got to make their own mason jar terror-rariums with dinosaurs.


There was plenty to eat, including "mummy" dip. I took 2 long logs of herbed chevre (Trader Joe's) and shaped it into a mummy body. Then I used Trader Joe's whipped cream and put it in a pastry bag with a leaf tip and zigzagged the whip cream across the chevre to simulate ribbons of cloth. I added googly eyes to add a touch of cuteness. The extra large sushi platter the mummy is resting on is from CB2.


My friends, Brittany and Danikka, provided the dipped pretzels and cupcakes for our candy bar:
Cupcake by Danikka, photo by britt.piehl


Lurking around the house were mummified vases. They were so easy and cheap to make: wrap mason jars or any other vase in cheesecloth and secure with hot glue. Add googly eyes with hot glue and add flowers of your choice. I even did it with mini pumpkins.


And the most terrifying of all were the "Holy Bat Wings" -- tasty baked sesame chicken wings dyed black care of my friend, Dan. Rounding out the festive menu was a spicy pumpkin chowder my husband made.

Friday, October 21, 2011

Some good things to come!

Wow, it's been waaaay too long yet again since I've posted. But since August, I've coordinated 5 weddings -- from Kohl Mansion to a private estate in Napa, and then Sebastiani Winery and Cornerstone Sonoma. The brides and grooms were wonderful to work with and the details for each of them were unique and dripping with "wow" factor. I can't wait to share in the next few weeks.

And in the midst of coordinating these weddings, my husband and I moved to a new nest, Pt. Richmond, a quaint bayside town whose most famous lady is Rosie the Riveter.

I've been busy fixing up the place and last night I bought a couple of beat up dining room chairs for $20 each. I'm reupholstering them with this beautiful yellow and gray Waverly fabric from Jo Ann Fabrics (the one on the left is one of my favorite linens you can rent at a high end rental company). Hurry on in -- right now, Jo Ann Fabric is having their Moonlight Madness sale -- all their fabric is 50% off, which means I got 2 yards of this for $44 versus $88!


I don't remember how to sew, but there are lots of cool things you can do, like:

Make a table runner for a candy buffet or escort card display.
Alice and Arvi's Wedding @ Cornerstone; photo by Vera Devera


or craft a ringbearer pillow

or create bunting as a decorative element for a whimsical wedding:
Jane & Ted's Wedding @ San Francisco Zoo; photo by Kevin Chin

Tuesday, June 21, 2011

Easy budget DIY succulent centerpieces

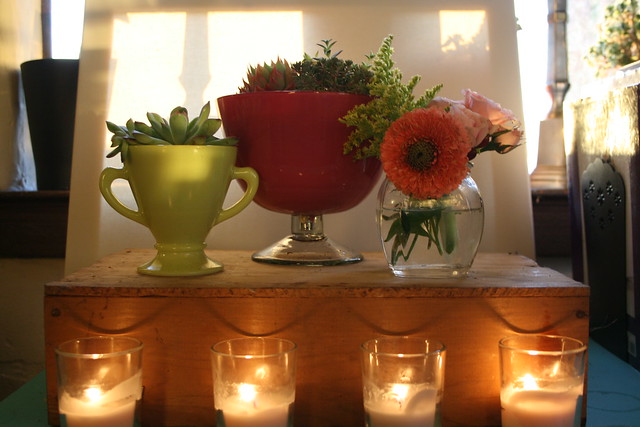
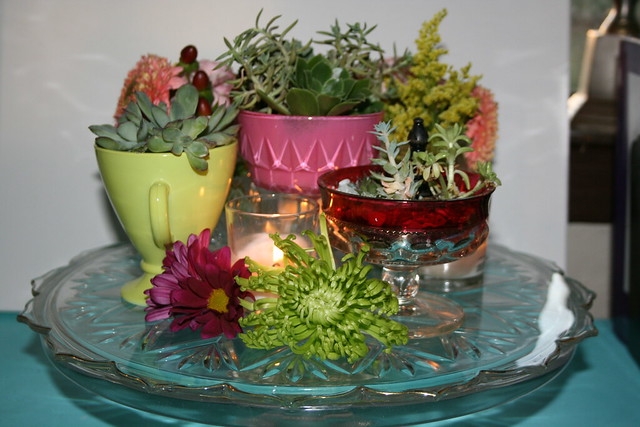
I've got a private dinner party coming up and I thought I'd make my own centerpieces using succulents and found objects. I bought salvaged wooden boxes ($3 each) that I turned upside down to create a platform and spray painted the insides of short sundae glasses ($1) with a $3 can of berry pink spray paint. The succulents were about $1.97 to $5.99 a pot at Home Depot -- fortunately, succulents are very hardy and can be cut and eventually regenerate their roots so I didn't have to buy very many to make these (I just took pieces from a handful of pots). I'm pretty excited to display these! What do you think?

Sunday, June 5, 2011

Getting hands-on with the gals behind "Handmade Weddings"

Handmade Weddings book by Eunice Moyle, Sabrina Moyle and Shana Faust
This past Saturday, Paper Source Berkeley hosted a "Midsummer's Eve Affair" with Eunice and Sabrina Moyle (the lovely ladies behind Hello!Lucky Stationery) and Chronicle Books, giving 16 lucky workshop attendees, including myself, the chance to create select projects from "Handmade Weddings: More Than 50 Crafts to Style and Personalize Your Big Day."
(L-R): Sabrina Moyle, me, Eunice Moyle, Christina and Lizzie of Paper Source Berkeley


If you don't already have "Handmade Weddings," I highly encourage you to get a copy ASAP (it's only $25). The Moyles and Shana Faust curated the DIY projects into major design themes -- complete with color palettes, suggested fonts, textures, and more to create a cohesive look. The step-by-step instructions, rated from easy to advanced, are easy to follow and time-crunched DIYers will appreciate the estimation of hours to complete the project.

My favorite chapters happen to be "Girly Romantic" (which includes the how-to on achieving Eunice's ethereal coffee-filter pom pom garlands that were featured in Martha Stewart Weddings last year) and "Happy Graphic," a whimsical and spirited look focused on fonts and bold patterns.

Lizzie sporting the Button Favors we made from the "Happy Graphic" chapter

The other great thing about Paper Source's workshop was that I learned some new tricks. The Paper Source staffers, like Christina, Fonda and Lizzie were extremely knowledgeable and introduced us to the incredible Xyron machine -- which makes anything into a sticker (Eunice even admitted it was a game-changer for her DIY-crafting). Another wonderful tool they shared with us was the embossing powder tray. I've been using paper plates and this simple tray has a funnel on one end so that you can pour the excess powder back into the bottle without making a huge mess. Best $6 buy ever.

Stay tuned this week for a how-to on making graphic paper clips with the Xyron gadget!
A DIY gal's best friend: the Xyron

My Button Save-the-Date, inspired by the "Happy Graphic" chapter 

Wednesday, May 25, 2011

Help Kelly Kick Cancer's Ass -- for Good!

Terrariums we made at Workshop SF - photo by Vera Devera (c) 2011
I love terrariums but sometimes I just can't bear the $50 price tag. That's why I jumped at the chance to take  Kelly Malone's terrarium how-to ($34) at Workshop SF, an affordable DIY school she founded two years ago. My old high school pal, Cindy, joined me on a late Thursday night (8-10pm, a perfect time for working girls like us) and Kelly led us through a jaunty, yet informative tutorial on building a terrarium. Since taking the class, I have been a terrarium-making fiend, collecting Scrabble letters, miniature plastic dogs and bunnies, and scavenging the neighborhood succulents to stock my own terrarium habit for about $10 a pop.

[For those of you who are curious, the materials you need to make a terrarium include: found glass objects (a Weck mason jar, coffee pot, cognac snifter), the eraser end of a pencil (to push plants into place), charcoal (to absorb the odor), potting soil, gravel (I like white!), and bits of succulents (apparently you can break off pieces of most hardy succulents and they will re-root without any extra treatment).]

Kelly Malone took the stress out of making terrariums with such good humor and cheerfulness. When I learned that she has an advanced case of cancer, I couldn't believe it. Her previous insurance carrier dropped her coverage due to her cancer diagnosis and she has no chance for getting new insurance due to her cancer being a pre-existing condition. Through it all, Kelly keeps a smile on her face while devoting much of her income and time to continuing Workshop SF. 

If you’ve been to an Indie Mart, if you have been to a class at Workshop, if you have been to a Kelly Malone event, or if you are simply a fan of Kelly’s mission, and willing to help out, we ask that you help out. Take a class or if you can't make a donation. Thanks!!
Kelly shows us the range of succulents to use in our terrariums
Mini plastic dogs, deer moss, bits of succulent make excellent terrariums
Related Posts with Thumbnails