Friday, April 30, 2010

Signature Drink: Mint Juleps

To honor Guitar Fred's southern roots, we're going to offer a signature drink: the mint julep!

Here are a few recipes from 7x7 I'm considering. Since the Kentucky Derby is this weekend, we might as well try 'em. The Honey Stone looks like a winner!

Three No-Fail Mint Julep Recipes from Rickhouse's Erick Castro

It's Kentucky Derby time, which means the pressure is on to make a killer mint julep.
So in the name of great Derby parties citywide, we're teaming up with Liquor.com to bring you three no-fail julep recipes from Erick Castro, bartender and general manager of Rickhouse. Check out the recipes below and read the full article on Liquor.com.


Mint Julep
Contributed by: Erick Castro

INGREDIENTS:
* 2 oz Bourbon
* .25 oz Raw sugar simple syrup (one part water, one part raw sugar)
* 8 Mint leaves
* Garnish: Mint sprig
* Glass: Julep

PREPARATION:
Lightly muddle the mint and simple syrup in a julep cup. Add bourbon and pack tightly with crushed ice. Stir until the cup is frosted on the outside.  Top with more crushed ice to form an ice dome and garnish with a mint sprig.


Georgia Mint Julep
Contributed by: Erick Castro

INGREDIENTS:
* 1.5 oz VS Cognac
* .75 oz Peach liqueur (Mathilde)
* 8 Mint leaves
* Dash raw sugar simple syrup (one part water, one part raw sugar)
* Garnish: Pineapple wedge and mint sprig
* Glass: Julep

PREPARATION:

Lightly muddle the mint and simple syrup in a julep cup. Add the remaining ingredients and pack tightly with crushed ice. Garnish the drink with a pineapple wedge and mint sprig.

Honey Stone Julep
Contributed by: Erick Castro

INGREDIENTS:
* 2 oz Bourbon
* .5 oz Honey syrup (one part honey, one part water)
* .5 oz Apricot liqueur (Rothman & Winter)
* 8 Mint leaves
* Garnish: Pineapple wedge and mint sprig
* Glass: Julep

PREPARATION:
Lightly muddle the mint and honey in a julep cup. Add the remaining ingredients and pack tightly with crushed ice. Garnish the drink with a pineapple wedge and mint sprig.
By Liquor.com


Thursday, April 29, 2010

A Visit with the Mr. and Mrs. of Aerialist Press

{Photo by Alexandra, Aerialist Press}

An August bride recently told me she was considering Aerialist Press, for affordable letterpress invitations. Affordable?! I was intrigued.

I scheduled a visit with Alexandra and Craig, the lovely couple behind Aerialist Press, in their chic studio in Emeryville (just down the street from Pixar).

As I entered their studio, to my right was a wall adorned with beautiful invitation suites and Bun, their huggable pet bunny, kept guard at the door. 

 {Bun}

As I inspected their work, they shared with me how they had been doing letterpress for only a year and a half -- basically since they had begun planning for their own "vineyard-feathers-and-twigs" wedding on a budget at Sattui Winery. Alexandra had taken letterpress classes in college and she fell in love with the art. She and Craig share artistic license and Craig handles the heavy machinery -- two presses (one's named Roxie!) dating from the early 19th century.

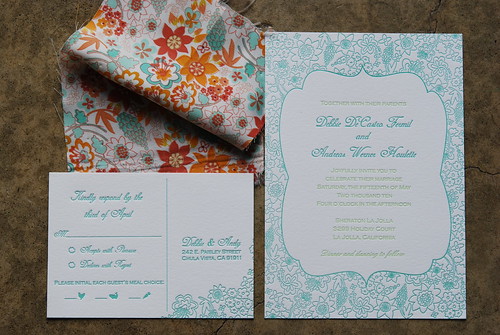
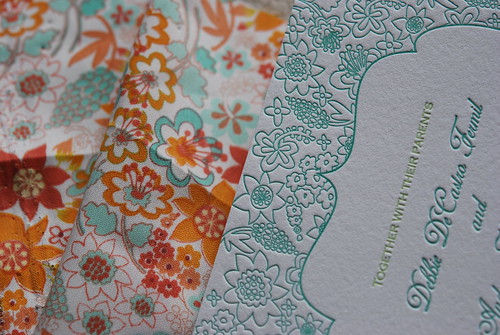
One of the designs they shared with me was inspired by a vintage fabric swatch their client had given them. Aerialist Press digitally rendered the floral shapes of the fabric and created the plate. The result is beautiful.


So, there really is such a thing as affordable and beautiful letterpress thanks to Aerialist Press. Their house invitation designs start at $225 (for 50 one-color) or $325 (for 50 two-color) and up to $325 (for 250 one-color) or $425 (250 two-color). Digitally printed envelopes start at $0.75 per envelope or else $1.00 for letterpress treatment.

Visit their website to see more of their awesome work and pricing.

Wednesday, April 28, 2010

Bridesmaids get-together: Green Gulch


I'm getting excited about a daytrip I'm planning to take with my four bridesmaids -- they all don't know each other very well so I thought heading to Green Gulch Zen Center would be a nice introduction.

I read about the Center in a recent issue of Sunset Magazine. Here's a snippet of the suggested itinerary. [Fortunately, you don't have to do all the activities -- as they told me, you can come and go as you please. How Zen is that? :)]

A DAY AT GREEN GULCH
8:15 am: Just be still
Make your way down a path to the zendo, a Japanese-style meditation hall converted from a barn. Clasp your hands and remove your shoes for an hour of instruction.When it’s time for meditation, cross your legs. Sit up straight. Gaze softly ahead. Breathe normally. Don’t sleep. Thoughts will arise: Let them. After 45 minutes of silence, a bell rings.


11:15 am: Nourish the soul
After a dharma talk on Buddhism or meditation, and before a Q&A with the teacher, it’s break time outside the zendo. Have tea and a fresh muffin or a warm loaf of sesame bread, made from the classic Tassajara Bread Book, from Green Gulch’s parent San Francisco Zen Center.


2:30 pm: Take a hike
The sheltered sands of Muir Beach are just a half-mile walk down valley from the gardens, past the center’s organic farm. For a longer hike, head up the ridge on the Green Gulch Trail to link to the Coastal Trail for a loop back to the center with splendid ocean views (about 3 miles).


Take it home: At the 11:15 tea break, look for baskets of produce grown right here on the farm. In spring, that might be spinach, kale, and chard. You can also pick up a jar of the center’s homemade organic plum or quince jam ($5.50) at the tea break or from the bookstore.

What kind of outings do you have planned with your bridesmaids?

Monday, April 26, 2010

3 tips for taking photos with your entourage

If you don't have the luxury of taking the bride-groom photos before the ceremony, or if you choose to see each other only at the ceremony versus before, you will likely have to take photos with immediate and extended family members as well as the wedding party just after the ceremony. Often times, there's only about an hour -- the cocktail hour -- to take these photos. If you have a large family, this may be daunting.

Here are some observations I have about expediting this process:

1) Ensure you have a shot list of which family members or close family friends you must take photos with (the wedding party is a given). Often, the mother of the bride wants her side with the couple, the father's side of the bride, and so on. Having the shot list will help your photographer assess the best approach for taking photos. For example, if you have tons of group photos, your photographer can work with you on deciding which ones should be priority (must-haves) versus the nice-to-haves.

2) Ensure you have a family member (or close friend) from the groom and bride's sides assigned to each family and gather everyone needed in the photos. Ideally that family member/close friend is familiar with most everyone. Your photographer won't know who Aunt Sally is or who Grandpa Ted is. But your sister, or great-aunt might. So ask that family member to help "herd" each side of the family. And whoever you choose must be assertive!

3) Ask your photographer what their shooting style is for taking these post-ceremony/group photos. In my opinion, the most efficient way is to start with the big groups first and then dismiss family members. The last people standing should be the bride and groom (or else the wedding party). It's more challenging to start with the bride and groom photos first and then try to add family members or other close friends because they are often wandering off to catch up with each other or grab a drink/appetizer.


[Tip #4: Ask your wedding coordinator or catering manager to have refreshments and a few appetizers close at hand for the bride and groom and/or wedding party because these photos often take place outside and the wedding party is already somewhat exhausted/potentially dehydrated from the day's preparations!]

Those are the top three that float to mind. I'm happy to hear more suggestions in case they've escaped me! 

Thursday, April 22, 2010

Inspiration #74: A Musical E-session

I'm super excited about coordinating Joanne and Vincent's wedding at the Four Seasons San Francisco this coming Saturday. They're such an adorable couple and here the photos to prove it (thanks to photographer, Caroline Tran). Joanne was also just featured on San Francisco Style Unveiled and even had some kind words to share about me (Va de Vie Events). 

Joanne and Vincent's playful guitar prop has definitely given me and Guitar Fred a few ideas on how our e-session might look.Click here to see more of this fabulous e-session.
 
 {Photos by Caroline Tran; featured on StyleUnveiled.com}

Wednesday, April 21, 2010

Win a free e-session

My friend Jessica is in her last year at Haas Business School and she happens to be doing a consulting project for a wedding photography company. She and her colleagues would like to hear from you what you find most important in choosing a wedding photographer.

Upon completion, you'll be entered to win a FREE engagement shoot in the SF Bay Area!

This survey should take no more than 5-10 minutes to complete. Please feel free to forward to your engaged friends (please note that we are only looking for respondents who are actively seeking wedding photographers).

Survey link: http://bit.ly/cBpF3A

Good luck in winning. Maybe a bit of my luck will rub off on you! ;)

Sunday, April 18, 2010

Inspiration #73: Aisle style

Hello my lovelies. Sorry I've been MIA this past week -- it's been busy with lots of events offline (including my own birthday party on the tennis courts)! I recently coordinated a beautiful wedding atop the hills overlooking the San Francisco Bay Area. The couple played up a garden theme with citrus colors, such as lime green, yellow and orange. I loved how they used fairly inexpensive paper lanterns to line their aisle (prepared by floral designer, Pilar Zuniga, of Gorgeous and Green). Oranges, limes and lemons weighed down the various lanterns.

{Photos by Vera Devera}

Tuesday, April 13, 2010

Real Wedding: Tee Time for Karen + Yu-Ming

Here's a real wedding that took place at the Ranch Golf Club in San Jose. The view was breathtaking and the bride and groom were lucky that their wedding date -- also the first day of spring -- was sunny! All images by Nancy Rothstein photography. 

Working behind-the-scenes:

Friday, April 9, 2010

Destination for DIY Divas: Workshop SF

I got today's Workshop SF newsletter and I'm driving myself crazy trying to decide which class to take. If only every major city had its own Workshop (and if you do, let me know!).

Here's the scoop: 
Located in an airy eight-hundred square foot space on the corner of Baker and McAllister, Workshop offers affordable DIY classes to the public, taught by many of the fabulous, creative folks from the Indie Mart, local designers, and of course, Kelly Malone. Classes range from the single class for the commitment-phobics, to the more detailed, multi-day classes for those truly desiring to learn their craft. Workshop is equipped with a complete silk screening facility, sewing machines, button machines,and lots of tools for cutting, printing, building, and making. Workshop also offers a library stocked with how-to books, design books, and old magazines to turn the light bulb over your head to ON.
The list of classes you can take are tantalizing -- and affordable. I've got an inquiry too on their private party offerings (like bachelorette and bridal showers -- woo hoo!).
  

Thursday, April 8, 2010

Inspiration #72: An Anthropologie Wedding

I can't hardly believe this wedding took place in the fall. The pastel blues and orange are cheery and the DIY details are enviable. So happy it's spring!


Tuesday, April 6, 2010

Upping the ante with uplighting

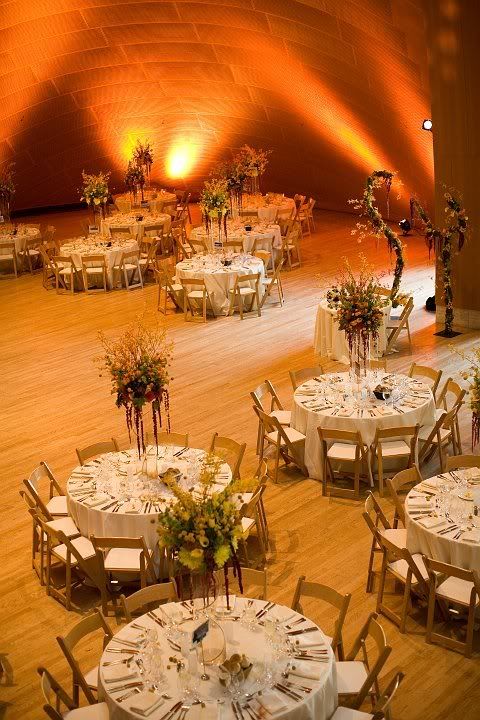
Uplighting can make a big difference in creating ambiance for your event. Are you using uplights? If so, are you using a neutral color like amber (which we might go for), or color?


Monday, April 5, 2010

Inspiration #71: A Bold Bouquet

Yum! This gorgeous bouquet belongs to a bold couple -- in fact, the bride wore red cowboy boots with her wedding dress. When in doubt, wear red!

Friday, April 2, 2010

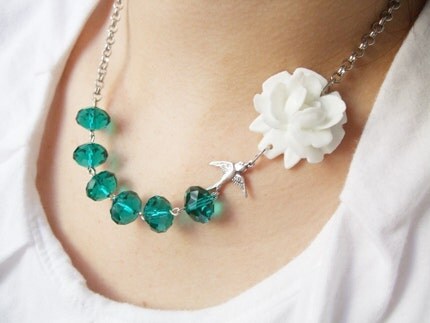
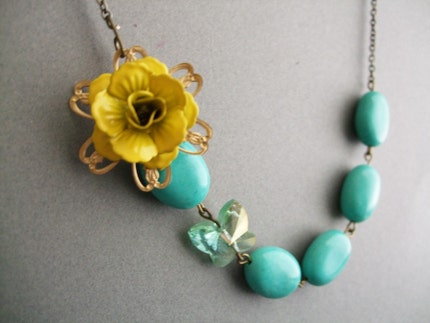
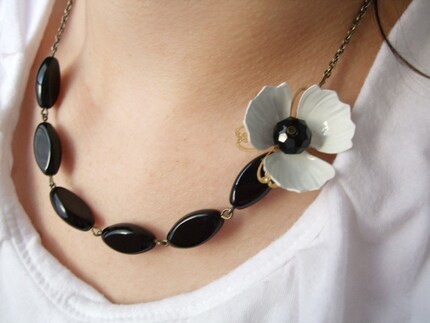
Etsy Find: Romantic Garden Inspired Necklaces

The Perfect Palette recently featured a cowboy themed inspiration board and a necklace featuring a large flower caught my eye.

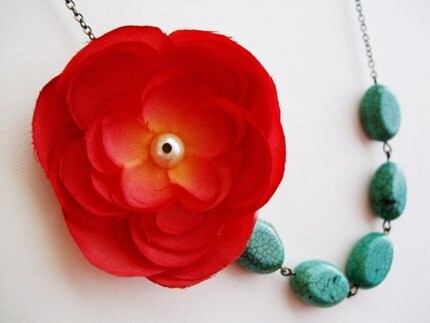
I ended up buying this one, but how cute are the other designs? And good news, they're extremely affordable (average price $29-32).

Here's the Mod Owl Necklace ($29.95) I just bought:

The necklace featured on Perfect Palette (Waverly, $32):

I adore this one (Teal Crystalia Gardens, $29.95):


Related Posts with Thumbnails