Tuesday, June 21, 2011

Easy budget DIY succulent centerpieces

I've got a private dinner party coming up and I thought I'd make my own centerpieces using succulents and found objects. I bought salvaged wooden boxes ($3 each) that I turned upside down to create a platform and spray painted the insides of short sundae glasses ($1) with a $3 can of berry pink spray paint. The succulents were about $1.97 to $5.99 a pot at Home Depot -- fortunately, succulents are very hardy and can be cut and eventually regenerate their roots so I didn't have to buy very many to make these (I just took pieces from a handful of pots). I'm pretty excited to display these! What do you think?

Friday, June 10, 2011

Feature on Style Me Pretty today

Last September, I had the pleasure of coordinating the day-of for a sweet couple, Angelica and Daniel. I love Angelica's style and it shines through! Check out more details to drool over at Style Me Pretty. (Check out the Burkart Studios video too!) The full gallery of beautiful photos are care of the very talented Andi Hatch (Photography).

Thursday, June 9, 2011

My pics of the week: e-sessions that rock

As I mentioned before, Pinterest is one rad tool  for curating and sharing all the pretty things you find online!

I decided to look up some of the photographers I love working with and see what they have been up to recently. Here's a peek of some photos I added to my "E-sessions that rock" board.

P.S. Feel free to add me on Pinterest!

Aren't they the cat's meow? Photo by Jerry Yoon Photography (c) 2011

Rain didn't stop them from having a great e-session. Photo by Jerry Yoon (c) 2011
This gal's dress is sweet! Photo by Andi Hatch Photography (c) 2011
Eat, love, play. How did the bride jump in those heels? Photo by Dorothy Hatchel (c) 2011


Beautiful shot in this spiral staircase. Photo by W Photography (c) 2011

Sunday, June 5, 2011

Getting hands-on with the gals behind "Handmade Weddings"

Handmade Weddings book by Eunice Moyle, Sabrina Moyle and Shana Faust
This past Saturday, Paper Source Berkeley hosted a "Midsummer's Eve Affair" with Eunice and Sabrina Moyle (the lovely ladies behind Hello!Lucky Stationery) and Chronicle Books, giving 16 lucky workshop attendees, including myself, the chance to create select projects from "Handmade Weddings: More Than 50 Crafts to Style and Personalize Your Big Day."
(L-R): Sabrina Moyle, me, Eunice Moyle, Christina and Lizzie of Paper Source Berkeley


If you don't already have "Handmade Weddings," I highly encourage you to get a copy ASAP (it's only $25). The Moyles and Shana Faust curated the DIY projects into major design themes -- complete with color palettes, suggested fonts, textures, and more to create a cohesive look. The step-by-step instructions, rated from easy to advanced, are easy to follow and time-crunched DIYers will appreciate the estimation of hours to complete the project.

My favorite chapters happen to be "Girly Romantic" (which includes the how-to on achieving Eunice's ethereal coffee-filter pom pom garlands that were featured in Martha Stewart Weddings last year) and "Happy Graphic," a whimsical and spirited look focused on fonts and bold patterns.

Lizzie sporting the Button Favors we made from the "Happy Graphic" chapter

The other great thing about Paper Source's workshop was that I learned some new tricks. The Paper Source staffers, like Christina, Fonda and Lizzie were extremely knowledgeable and introduced us to the incredible Xyron machine -- which makes anything into a sticker (Eunice even admitted it was a game-changer for her DIY-crafting). Another wonderful tool they shared with us was the embossing powder tray. I've been using paper plates and this simple tray has a funnel on one end so that you can pour the excess powder back into the bottle without making a huge mess. Best $6 buy ever.

Stay tuned this week for a how-to on making graphic paper clips with the Xyron gadget!
A DIY gal's best friend: the Xyron

My Button Save-the-Date, inspired by the "Happy Graphic" chapter 

Thursday, June 2, 2011

My $45 Wedding Band

Because my 14k rose gold and amethyst engagement ring is so fabulous by itself and quite large, we almost didn't get a wedding band for me. But when I stumbled across Kate Szabone's shop on Etsy, I gave it a second thought especially because she offered a 14k hammered rose gold band that was thin enough not to distract from my engagement ring. Plus, the price was right -- only $45 plus shipping. While the price of gold has increased a little bit since October 2010, the ring remains very affordable at $48. Szabone offers other styles of affordable but stylish rings featuring semi-precious gems as seen below.

Above: This is the ring I got to use as my wedding band! Photo by Kate Szabone - Etsy.com
For the nature-lovin' gal, here's a 14k gold twig ring! I liked how they're stacked.
Photo by Kate Szabone - Etsy.com

And here's a pair of his and hers 24k gold bands with diamonds for $995 -- Kate uses the 100-year-old hammer passed down from her grandfather to finish it as if were "found at sea."
Photo by Kate Szabone - Etsy.com

Wednesday, May 25, 2011

Help Kelly Kick Cancer's Ass -- for Good!

Terrariums we made at Workshop SF - photo by Vera Devera (c) 2011
I love terrariums but sometimes I just can't bear the $50 price tag. That's why I jumped at the chance to take  Kelly Malone's terrarium how-to ($34) at Workshop SF, an affordable DIY school she founded two years ago. My old high school pal, Cindy, joined me on a late Thursday night (8-10pm, a perfect time for working girls like us) and Kelly led us through a jaunty, yet informative tutorial on building a terrarium. Since taking the class, I have been a terrarium-making fiend, collecting Scrabble letters, miniature plastic dogs and bunnies, and scavenging the neighborhood succulents to stock my own terrarium habit for about $10 a pop.

[For those of you who are curious, the materials you need to make a terrarium include: found glass objects (a Weck mason jar, coffee pot, cognac snifter), the eraser end of a pencil (to push plants into place), charcoal (to absorb the odor), potting soil, gravel (I like white!), and bits of succulents (apparently you can break off pieces of most hardy succulents and they will re-root without any extra treatment).]

Kelly Malone took the stress out of making terrariums with such good humor and cheerfulness. When I learned that she has an advanced case of cancer, I couldn't believe it. Her previous insurance carrier dropped her coverage due to her cancer diagnosis and she has no chance for getting new insurance due to her cancer being a pre-existing condition. Through it all, Kelly keeps a smile on her face while devoting much of her income and time to continuing Workshop SF. 

If you’ve been to an Indie Mart, if you have been to a class at Workshop, if you have been to a Kelly Malone event, or if you are simply a fan of Kelly’s mission, and willing to help out, we ask that you help out. Take a class or if you can't make a donation. Thanks!!
Kelly shows us the range of succulents to use in our terrariums
Mini plastic dogs, deer moss, bits of succulent make excellent terrariums

Friday, May 20, 2011

Inspiration #93: Party on a Goat Farm

This post is a little overdue (by a month!). Ever since I saw this kids' unicorn birthday party on Birthday Girl blog, I wanted to have my own. Throwing my birthday at Harley Goat Farms (Pescadero, CA) was as close as I could get and I have to admit, after visiting this charming farm, I have no doubt that their goats are indeed magical (c'mon, how can you resist a cutie like the one below?). And I now fully appreciate why some couples would want to have a small destination wedding here!

Harley Goat Kid - Photo by Vera Devera (c) 2011
I decided to book a private tour of the farm rather than chancing it with a public tour; the minimum is $400 (or 20 people at $20 each). I purchased muslin bags on Etsy and prepared goat-themed favors: Happy Goat Tahitian Vanilla Bourbon Caramels from Foodzie.com and handmade verbena scented 
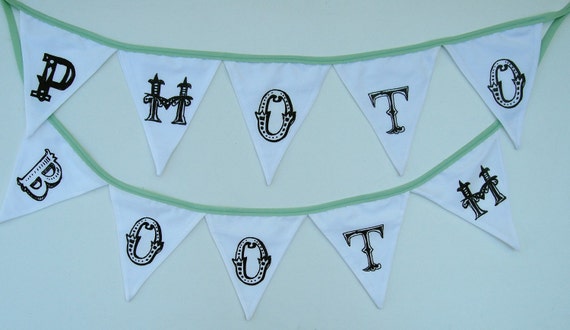
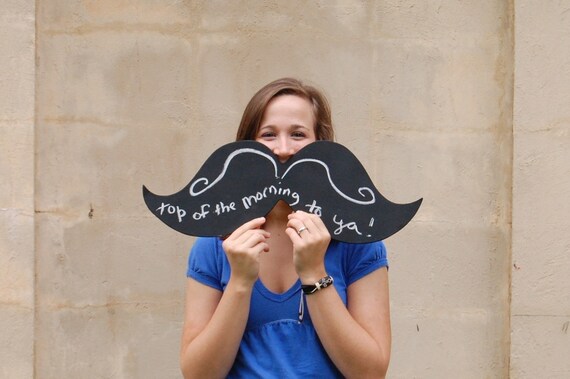
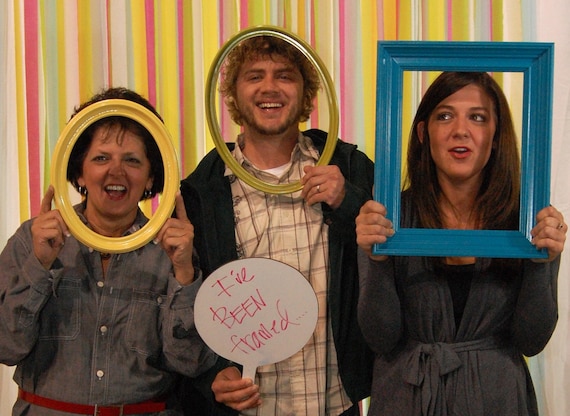
goats' milk hand soaps. The biggest surprise was getting photo booth prop-designer, Maro Designs, to custom make unicorn horns (in pink and silver!) and a goatee. I have no shame.

Yes, that goat is rocking a mystical unicorn horn thanks to Maro Designs
On the day-of, my friends and I rolled up to Harley Goat Farm and were surprised to see how "small" it was. We were a little apprehensive that it could take two hours. But once we started, we realized we didn't want to leave!

Our tour guide was very informative and gave us enough time to take photos and pet the goats. She proudly shared  Harley's colorful history and sustainable farming practices.  Dee Harley's integrity for treating her goats very well, making cheese in small batches, and keeping the business local is both admirable and inspiring.

In the cheese-making room, I got a chance to decorate my own Monet cheese wheel and share it with my friends in the garden afterwards.The fun continued in the cozy cheese shop where the samples are abundant.

Our trusty tour guide also took us upstairs to check out the restored 1910 hayloft where Dee hosts private events, like dinner parties (5-courses, $150) and small wedding receptions. The chairs and table hand-carved by Three-Fingered Bill are quite whimsical and perfect for the setting.

Getting so up-close-and-personal with both the animals and people who produce such wonderful food was invigorating, not to mention the experience was intimate for me and my friends -- we had such a blast! I encourage you to seek out your local flavor makers, like Harley Goat Farms, and support them for your next special occasion.

P.S. In case you make it out to Harley Goat Farm, I recommend picnicking at nearby San Gregorio Beach off of Highway 1. Pick up some garlic-artichoke bread at Arcangeli Grocery Co in Pescadero (the bakery also provides the bread for the samples in Harley's cheese shop) and maybe an ollallaberry pie at Duarte's Tavern.
Monet Cheese Wheel hand decorated by me! Photo by Vera Devera (c) 2011

Monday, May 16, 2011

Minted's $1K Program Challenge: Two Hearts Become One

Minted.com is hosting a DIY contest to celebrate their newest product line: programs! [Wish I had these when we were getting married -- it would've made everything easier.]

I received three programs in the mail to play with and my favorite is featured below. I used felt heart buttons leftover from Valentine's Day card-crafting and an elastic gold band. Then I punched mini holes to connect the insert to the program cover provided and voila -- two hearts become one. I slipped some salvaged lace around the whole program to keep it closed (optional).

The red hearts add a sweet touch and a burst of color. Keeping my fingers crossed that this will be a winner!

Sunday, May 8, 2011

Inspiration #92: Mandaps!

Recently, I was honored to coordinate a wedding for a great couple, S + A, at Terra San Francisco, a modern event space that also doubles as an art gallery. It was the first Hindu ceremony I had ever been a part of and the mandap, which is akin to a chuppah, was quite breathtaking (designed by Paige Benjamin at Passiflora Designs). Cymbidium orchids cascaded down above a stage and silver chivari chairs.

All Hindu wedding rituals are performed in the mandap. The four "pillars" represent the bride and groom's parents and honors the important role that each set of parents have played in raising the bride and groom. The pandit, or priest, conducts the wedding ceremony and prepares a sacred fire, which is witness to the ceremony. 
Mandap at Terra San Francisco; photo by Vera Devera, design by Passiflora Designs

View of the aisle, lined with rose petals and string of cymbidium orchids
 Here are some more mandaps to inspire your ceremony "altar":

Photo by A Bryan Photo; originally from Marigolds and Mithai

Saturday, April 2, 2011

Inspiration #91: Pimp my photo booth

Like many of you, I adore photo booths. They are so much fun and you can be quite surprised by the resulting images you get.

I came across Playing Grown Up on Etsy and if you're DIY-lite me and want to jazz up your photo booth, here are some props you can buy. For example, I painstakingly spent 1-2 hours making a photo booth bunting out of paper, but Brooke has made an adorable one out of fabric. I wish I had known about this to save me time!

Photo booth bunting banner - $35 at Playing Grown Up


Mr. Mustache Chalkboard - $28


Chalkboard Scroll Banner - $32
Reversible Chalkboard and White Board - $30

Friday, March 25, 2011

Celebrate the Royal Wedding with Save the Children

Spotted this interesting way to celebrate Kate and William's wedding: throw a party and raise money for poor kids around the world! The suggested activities include getting you and your married friends to wear your dresses again or even pinning the tail on the corgi (my chi-corgi, Munch, wouldn't like that!).

Celebrate Kate and William's big day and help raise money for the world's poorest children. Even if the royal wedding doesn't float your boat, you can party for us anyway!

BORN TO KNOW IT ALL

Test your colleagues’ royal knowledge with our quiz. Charge for entry and the winning team get to be treated like royalty for the day. Another cup of tea your Highness?

WEAR YOUR WEDDING DRESS AGAIN

Throw a fancy dress party with a difference and get your guests to wear their wedding or bridesmaid dresses. The blushing brides make a donation to attend – a small price to wear their favourite outfit again – and you could sell mini wedding cakes to boost your fundraising total.

ROYAL WEDDING SWEEPSTAKE

Play our royal wedding sweepstake to win a cash prize and help save children's lives. Put the poster up at work and get your party guests to guess what Paul O’Grady would buy Kate and William as a wedding gift. Order your royal wedding sweepstake poster using the form at the top of the page.

Thursday, March 24, 2011

Inspiration #90: ctrlP Design's invitation suites under $35!

Traffic to my blog has recently been coming from a site called, Pinterest, and out of curiosity, I clicked through to it. What a cool app and site -- basically, you create a profile and then drag the "Pin It" tool to your browser's toolbar and "Pin" images that you really dig. No more having to make screenshots with FastStone Capture, bookmarking or copying and pasting inspirational images. Everything's stored on your personal boards -- and you can share inspiration very easily and quickly.

One of my boards is called "Paper Lust" and that's where I store great invitations, save-the-dates, prints and more that I come across. And I'm stoked to recently pin @luvyourway's invitations from her Etsy shop, ctrlP Designs (love that play on a keyboard shortcut).

Ultra Mod Printable Invites by ctrlP Designs
Mixtape Printable by ctrlP Design

Tuesday, March 22, 2011

Wedding recap: our photo album scrapbook

A reader of this blog asked me today: "Did you ever share the scrapbook you mentioned? I want to do a guestbook with pictures and am thinking each guest (couple or family) could take a page and write their names and a note and then their picture will be added later. However, I'm not quite sure how it will all work out and I would LOVE to hear what you did! :)"

Traditional guestbooks (where guests just sign their name) aren't my style -- I wanted something more personal. What we did was hire Green Cheeze Photo Booth so that our guests could take fun photos and immediately scrapbook one of the two strips they got after their session. We provided heavyweight black paper, gel pens and scrapbooking trim and baubles (all in the bargain section at Michael's or Target). Some friends even used our program! I had such a blast reading everyone's messages at the end of the night (and for the weeks to come). Here are a few of my favorites:


Wedding Recap: Our Cake

Recently, many of my clients have been asking for my recommendation for a cake designer and I realized I hadn't given an update here on the blog on how our cake turned out -- thanks to the fabulous, Alison Okabayashi of Two for Two Cakes. (See past posts, Cake Tasting Parts 1 and 2)

Alison baked a two-tiered cake with buttercream frosting for us. Fred loves Reese's Pieces so it was only fitting that the bottom layer was the Peanut Butter Cup, made of  Chocolate Butter Cake, Peanut Butter Cream Cheese Frosting and Salted Peanuts. At our tasting, we were both bowled over by the Aunt Bea’s Banana Cake, made of Banana Cake, Heath Bar Toffee Bits, and Vanilla Butter Cream Cheese Frosting, and decided it would be our top tier. [We have a few friends who are still telling us that the Banana Cake was the best wedding cake they'd ever had!]

I had bought vintage type letter caps ($3 each) that spelled VERA and FRED and Alison tied them together with teal grosgrain ribbon and gray felt heart (the heart was her special touch). Two glittered birds in a nest topped off the design, which also feature swags and dots in charcoal gray. The cake turned out to be super cute, don't you think?

To learn more about Alison, see my interview of her here from 2009>>

Cake by Two for Two Cakes (San Francisco) and photos by Davina + Daniel (c) 2010 All rights reserved

Thursday, March 17, 2011

For Japan With Love: please give as much as you can afford

Tomorrow, I will be standing in silence with hundreds of other bloggers to raise awareness and pay respect for the families in desperate need in Japan.

Utterly Engaged and Ever Ours joined forces to create For Japan With Love, which has a direct link on the website to the fundraising page for ShelterBox, one of the first responders to Japan after the quake and tsunami. Each ShelterBox relief package is tailored to the nature of the disaster but typically contains a disaster relief tent for an extended family, blankets, water storage and purification equipment, cooking utensils, a stove, a basic tool kit, a children’s activity pack and other vital items.

So far, For Japan With Love has raised over $16,000 and the number continues to grow with the support of people like you and me. Please give today and also spread the word!

Tweet: Help Japan via @UtterlyEngaged and @Ever_Ours http://bit.ly/hSg60g #forjapanwithlove

Saturday, March 12, 2011

Dancing under the...umbrellas

A friend of mine gave me 20 red parasols last year when she moved and I've always wanted to do something like this with them...

If you fancy this look as well, you can rent them; the Pagoda style goes for about $20 each -- some of the print ones are $10 each. Head over to Bella Umbrella and reserve your favorites today. [Lucky brides in the Seattle area can save on the shipping cost!]

And for extra credit, check out a 2009 post about Bella Umbrella's retail shop. It's gorgeous!

Photo by Gabriel Ryan Photographers; see Real Wedding on 100 Layer Cake
This is one of my faves -- in green and silver with an amber handle
This one is only $10 and would be perfect for an art deco look
And this would be perfect for an engagement session in the spring 

 Bella Umbrella Shop in Seattle. Photo by Bethany Murphy Photography
Related Posts with Thumbnails